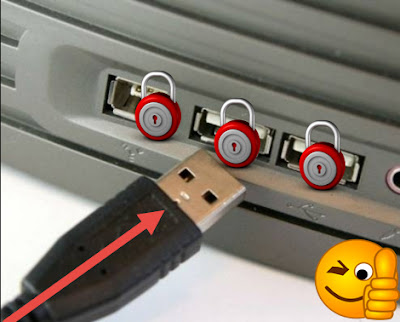
You may have personal documents in your computer which you wouldn’t like to share via USB flash drive from USB port. So what to do? You can enable USB protection by simply lock USB storage access or disable USB ports of all USB hub to prevent data leakage by USB drive. This is very important for a software company, IT firm or any private business who don't want to share their private documents or want to restrict users from taking any data from the work station. So you can better block/disable USB access to mitigate your business’s security risks and protect your sensitive files. On the other hand I will also show you how to enable or unblock USB drive, the only thing you need is administrative privilege to do the job. You can also block windows command prompt to ensure more security.
Related: How to block a website in any browser without any software?
How to Enable/Disable/lock/unlock USB ports or drives
I will show you six easy methods of enabling/ disabling USB access of a computer without any USB lock software. Windows operating system itself has the solution. If you’re the administrator then use any of the following methods to Enable/Disable USB drive of your computer. If you found the USB access disabled then I suggest you to try every method because you’re not sure which way the USB port access was disabled.
1. Enable or Disable USB ports via Device Manager.
2. Enable/Disable USB ports by changing registry values in windows registry editor.
3. Enable or Disable USB ports by installing or uninstalling USB mass storage drive.
4. Enable/Disable USB ports through BIOS set up.
5. Enable or Disable USB ports by changing permissions to usbstor.inf and usbstor.pnf files.
6. Lock or Unlock USB ports of front panel by connecting or disconnecting USB header.
Enable or Disable USB ports via Device Manager:
- Press Windows key+R
- In the “Run” type devmgmt.msc
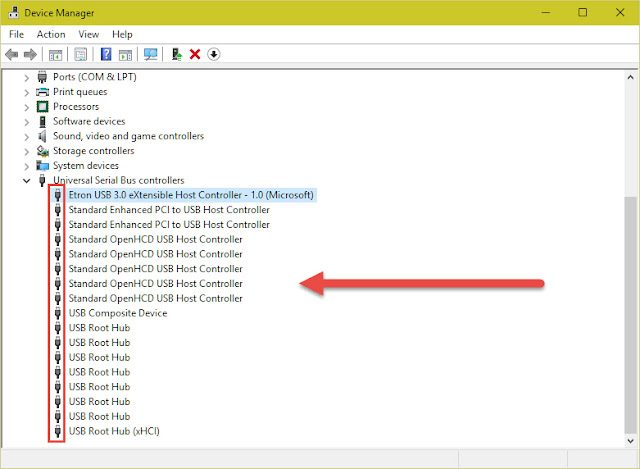
- This will open Device Manager of the computer. Now look for Universal Serial Bus Controller and double click on it.
- In the sub-menu panel check any port whether it is disabled by the admin.
- Enable all the ports.
*** You can disable USB ports by disabling all the ports in the Universal Serial Bus Controller.
Enable/Disable USB ports by windows registry editor:
This is also an easy option. You can block or unblock USB by changing the registry values.- Press Windows key+R
- In the “Run” type> regedit
- Navigate to “HKEY_LOCAL_MACHINE> SYSTEM> CurrentControlSet> Services> USBSTOR”
- In the right side pane double click on START and change its value to 3 to enable USB ports.
- Click Apply> OK
*** To disable USB Storage change START value to 4 in the right pane of USBSTOR. Click apply then OK. You will be able to use pen drive now.
Lock or Unlock USB ports by installing or uninstalling USB mass storage drive:
When authorities are really cautious about security of the important documents and they can enforce this method. Admin can uninstall mass storage drive.- Insert any USB drive and let windows find the right compatible USB driver for your USB disk.
- Windows will check for appropriate driver. Update the USB driver and you will be able to use USB ports then.
- You have to have admin access to apply this method.
*** To uninstall USB mass storage drive go to device manager and select the USB driver from Universal Serial Bus Controller. Right click on it and click uninstall.
Enable/Disable USB ports through BIOS set up:
To disable USB port in bios settings follow those simple steps:- Enter BIOS edit menu by pressing DEL when computer starts at the very first page.
- Look for the option “enable or disable the on-board USB ports”
- Turn of all USB and Legacy USB Support to disable USB port.
- After changing the value press F10.
- Save and Enter.
- Computer will then restart now check the USB ports to be sure that they have been properly disabled.
*** To turn on or enable USB ports via BIOS simply enable all USB and Legacy USB supports.
Enable or Disable USB by changing permissions to usbstor.inf and usbstor.pnf:
- Open windows explorer
- Type “%windir%\inf” and hit ENTER
- Now you’re in the C:\Windows\INF folder. Look for usbstor.inf and usbstor.pnf files.
- You have to change the permission in both files.
- Right click on the file and select Properties. Then Go for securities tab.
- Select the user or users group you want to control. Like Users or Administrators.
- To change permissions click on EDIT.
- To block any user or user group DENY all attributes and to unblock any groups or users click on Full control, or you can manually check the boxes.
***If you deny all the value to any user then he/she will not be able to install any USB driver in your computer and if you allow full control to any user he/she will be able to install USB driver.
Disconnect Desktop computer’s front USB port by disconnecting USB header:
This is a very old method. This will only work for front USB panel.- In the computer casing USB ports were connected by USB headers.
- Simply unplug the USB header to disable/block front USB panel
USB storage's like pen drive, flash drive or USB memory sticks can deliver malware infections that can lead to data leakage, and bring auto play virus or any other unwanted programs. Sometime disabling USB ports is a must. To a large company customer data, company’s financial information, employee data, business plan, source code, marketing plan and intellectual property is very much important. So network administrators can block USB storage anytime to ensure company’s security by enforcing parental control over USB access.
Also Read: advanced google search tips and tricks
Also Read: Top 10 Most Popular Torrent Sites


Very informative post. Clear precise details on how to enable /disable usb drive.
ReplyDeleteThanks Tiyi. Sometime disabling usb ports for any kind of usb storage is very important to avoid data leakage.
DeleteI have recently started a blog, the info you provide on this site has helped me greatly. Thanks for all of your time & work.
ReplyDeleteUSB名入れ
Thanks
ReplyDeleteUSB port locker is the most useful software which allows you to present in data leakage from your PC.
ReplyDelete